Decorating for Halloween! Tricks and Tips to Make Your Home Extra Spooky!
There are so many things I love about Halloween but of all of those things there is one thing I have always dreaded: decorating for the holiday. I’ve tried sticking to themes or color schemes, but my Halloween décor always looked like a mash up of random items strewn about the house haha!
Here were my top five reasons for not decorating for Halloween:
1. Our pets. I love our pets, all of them, but have you ever seen a cat carrying off a fake spider at three in the morning and almost died? Or had a gang of chickens roll your pumpkins off your porch (I assume to smash it) only to watch it roll through the yard, into the street and disappear into the woods? It’s hard decorating with pets for any holiday…

2. Lack of coordination. Do I mix fall décor with Halloween décor? Ghosts or zombies? Cute witches or evil witches? Spiders or bats? In past attempts, my house looked like Spirit Halloween had a penny sale and I just bought all the random unwanted décor and scattered it around like my nine-year-old does when he busts out every toy bin in the living room floor. Random items perched everywhere, it just looked messy!
3. Costs. To decorate the way my heart desired (scary and creepy and bigly) it felt like an additional blow to my pocketbook. A decent amount of our spooky décor had been destroyed when our old apartment basement had the sewer back up and rebuilding a decade’s worth of items wasn’t going to happen overnight. Times are tough, money is tight, I just couldn’t justify splurging on over-the-top pieces even if I wanted too.
4. Ideas aplenty, execution zip. My Pinterest boards are overflowing with awesome crafts and different tips on how to “haunt” your home. The problem for me was making those ideas come to fruition. If I started one project, something always prevented me from finishing it. My office is full of half-completed wreaths and random sketches of what I intended to do…
5. TIME. My biggest downfall. I am by far a tried and proved procrastinator. Plenty of Halloweens passed vouched for that. Last year, I decorated on Halloween. I put out the dragon on our front porch and inside I draped our dining table and put out a few pieces. That was it.
This year, that had to change. The kiddos have missed out on celebrations and get-togethers for the last two years and the little things that make childhood such a fascinating time. I busted out my one clear tote with random Halloween décor and laid it all out in our den. Looking over it all, there definitely wasn’t a theme (then again, is a theme really necessary when it comes to Halloween?) some things were creepy, and some were cutesy (like the inflatable dragon my son had begged for at the Dollar General three years ago).
My determination was strong y’all! Just needed a starting point. Thanks to Pinterest and YouTube, a.k.a. my inspiration fairies, I decided to order these 3d Bat Decorations that I envisioned going up our stairwell above our vintage photos and around the big clock on the den wall. Starting point – check!
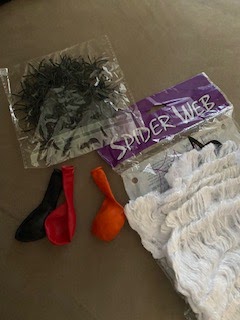
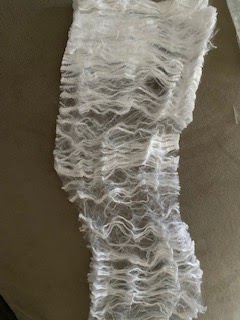
Next, I headed to our local Dollar General and Dollar Tree. Spiderwebbing (the stretchy kind) was my next thought. It’s super easy to work with, cheap at only a dollar per pack, and easily can be layered over anything in your home or outside. I scored a couple other finds and got to work on our stairwell and den.
To start, I knew I wanted the 3d bats going up our stairwell, looking like they had just flown in from the front doors! Creases along the bat’s wings could be folded either back or forward to add dimension and make them appear to pop off the wall. Command-like strips attach to the back of the bats and then you just place them on any flat surface you want. Easy!
Now, on that same wall, we have a ton of antique and vintage photos. This is where the spiderwebs came into play. Every haunted house needs some spiderwebs right? Starting at the top photo, stretching the spiderwebbing as I went, coating each photo with the webbing gave me the look I was hoping for. Once the photos were covered, there was plenty of webbing left to stretch over the mirror and even enough to cover the corner and front door (the side we don’t use). It created a perfect creepy nook!
Turning my attention to our den or family room, the area of our home we spend the most time in as a family, the 3d bats and spiderwebs were great additions to our giant wall clock. Using black cloth, I had saved from previous years, I draped the clock with the cloth first. Next, I stretched the webbing over the clock face. Layering is a great way to add interest in decorating! Think of it as providing a solid base to display your favorite pieces on and focus on the colors and textures of your layers. To finish, I added the Dollar General skeleton garland along the bottom of the clock and then added more 3d bats surrounding the clock. I really love how this turned out, especially because the wall clock was already an anchor in the den, drawing your eyes towards that end of the room.
On to the other massive wall hanging, a.k.a. the television, I was running out of 3d bats but had just enough to scatter a few coming out from behind the t.v. Below it I have an old steamer trunk that our Echo Dot sits on and this is the perfect space to display those creepy pieces I have held onto over the years. Again, I draped another piece of black fabric (I later add the off-white cloth) and set up a few décor pieces. To finish this space, I added some purple string lights that tie it all together.
Mr. Dragon and his pal scaredy-cat were both in the bay window, but it didn’t quite feel right and when we checked to see how it looked from the outside that night, you could barely make out Mr. Dragon at all from the street. Instead, he found a new spot in the corner of the den.
Click here to see my video “Halloween Decorating – Part 1”
Tackling the bay window was a tricky one for me but it truly is the showcase spot for the holidays, no way could I just leave it bare. After pondering over a few different ideas, I decided to create a spooky window display using black poster board, battery powered candles, and more string lights. This also meant I needed to run back to the Dollar General…
Luckily, I found two packs of orange string lights, two black pieces of poster board, but no taper candles. I had already ordered a few pieces to go outside off Amazon, but I figured it couldn’t hurt to order one more thing, right? HAH! One more thing turned into three but who’s counting?? Oh, did I mention my Target finds? Um, yeah, keep reading for those…
The plan; finish decorating for Halloween before Halloween day. That was the only plan at this point.
Okay, back to the bay window. I used the black poster board and sketched the outline of half a giant spider for the center of the window. I cut this out and cut out four circles for eyes that would allow orange light to glow through. Next, I sketched a few bats and several different sized jack-o-lanterns. Then I taped the cutouts to the window. Running the orange string lights around the inside of the window frame, my hope was to create an eerie glow making the cutouts visible from the street. Scaredy-cat stayed in the window, just turned to face the den instead of out of the window.
Next, the outside décor. Now, y’all have to understand that with all these chickens and geese and puppies running around out there, my anxiety over whether we should decorate the outside is valid. The last thing I wanted was to have to explain to our vet why my dog ate a fake bone or my chicken’s belly was full of fake spiders. Safety first – no décor within pets’ reach. Aesthetically speaking, I could get away with a few things as long as they were off the ground. This led to me ordering a set of giant fuzzy spiders. Personally, I am terrified of spiders! More than ghosts or zombies, I can’t think of anything more terrifying than these silent eight-legged critters. Remember the 1990 movie “Arachnophobia”? Jeff Daniels plays Dr. Jennings and John Goodman is the eccentric exterminator Delbert McClintock, one of his finest performances in my opinion 😊 Anyhow, that was my inspiration for outside. What could possibly be more terrifying than a giant spider invasion?!
To achieve this, I purchased a pack of 6 fuzzy over-sized spiders and another package of spiderwebbing that came with a couple dozen plastic spiders. These plastic spiders were super easy to attach to the webbing thanks to these nifty hooks on the underside. You could also purchase spider rings at the Dollar Tree and just cut the ring in half to make it easier to secure them in place (but mine was out!).
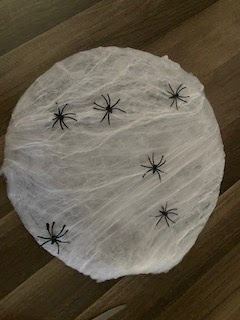
Starting at the top corner, stretching the webbing down over the unused front door and around the corner of our house, that was my base. The fuzzy spiders came in graduating sizes from small to extra-large. I attached the extra-large spider at the highest corner using a manual staple gun and came down with the remaining spiders to the corner of the house. Next, I wanted to create egg sacs and hang them from the overhang. I decided to make these as opposed to buying them because they were upwards of twenty bucks online! To make the eggs sacs:
You’ll need:
White or Clear Balloons (one for each sac)
Clear Tape
First, cut or pull apart a section of webbing. The amount you need depends on how large you inflate your balloon.
Next, inflate your balloons to whatever sizes you’d like your spider egg sacs to be (I did three different sizes). Now, I used colored balloons we had on hand from birthdays but to make this project easier, white balloons would be ideal.
Then, take a section of webbing and stretch it over your inflated balloon. This part is a little tricky, but you can secure the webbing with the tape or just crisscross the webbing to achieve the look you want. For me, I found that putting the balloon in the center of my section of webbing and crisscrossing the web over the balloons worked well but also allowed me to keep the balloon balanced for hanging.


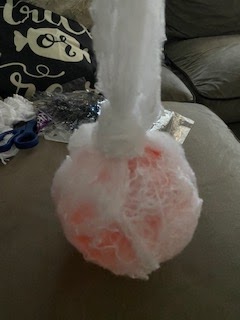
Next, I looped the webbing and tied a knot near the top of the balloon leaving extra webbing to stretch and attach to the house.
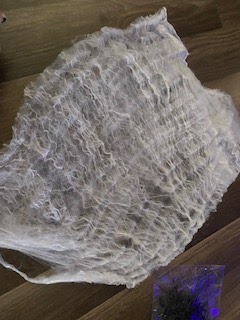
The last step is to cover the sacs with plastic spiders! Add as few or as many as you’d like. Then secure to whatever spot you’d like to display them from! They are light enough to be held by tape.
Here is the finished product:

Next, the wreaths for the front doors. Again, super easy, using two wreath forms I already had stashed away, I just wrapped them in webbing and added spiders. You could dress them up with black roses or skulls or just about any spooky element you want!


To finish my pet friendly décor, I added to wooden carved pumpkins I had purchased several years ago at an antique shop. Wood or plastic pumpkins are great alternatives to the real deal if you have trouble with squirrels or critters like we do. The chickens and geese get pumpkins on Halloween night, don’t worry, they don’t get left out!

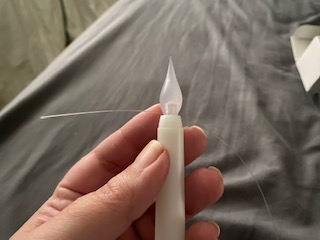
My battery-operated candles arrived, and I was super excited to do finish off the den and bay window. The taper candles work with two triple a batteries and twist on and off at the bottom. My thought was to hang three in each of the small windows and then six above the television. Using clear fishing line, I tied the line securely around each candle flame and then staggered the hanging height by cutting the lines at varying lengths. I did six above the television and decided not to hang any in the bay window.


Oh, I almost forgot! I did use these pillow covers to add the finishing touches to the den! Switching out pillow covers is another easy way to decorate for different holidays and seasons. I recover my throw pillows several times throughout the year.

Finally, the stairwell, den, and outside was finished! All that was left was to add a couple pieces in the kitchen and living room.
Since our downstairs area takes a beating daily, between pets and kids and just daily life, I wanted to add a little Halloween flare but avoid adding to the chaos. Somehow, I ended up on Target’s website...and you can guess what happened from there.
BUT – if you really want to know, I’ll tell ya!
It started off with ordering Halloween costumes for the kiddos. Ghostbusters this year (or maybe exterminators??). Then somehow, I clicked on Halloween décor (totally by accident) and spotted this piece I just couldn’t live without; Skeleton Playing Banjo. As soon as I seen this bony fella, I knew he’d be perfect on the piano! Until our kitten decided that spot was hers and hers alone. So, I put him in the recliner in the den.

But he’d need something to go next to him, ya know? Couldn’t have him sitting there alone. So that’s when I found this lantern with another battery-operated candle, this cute pumpkin patch sign and voila! I’m considering it my one splurge in the Halloween budget category this year and it fits in perfectly.
Okay y’all, I’ve rambled on plenty about overcoming my fear of decorating for one of my favorite holidays, so here is the results.
Watch “Halloween Decorating – Part 2” here to see a walk-thru of my madness up close!
If you need more details on anything, leave a comment below or make sure to follow my socials here for all the latest!
Happy Halloween witches and ghouls!!
xxoo,
Crystal


Comments
Post a Comment